I Could Eat Scones Every Single Day
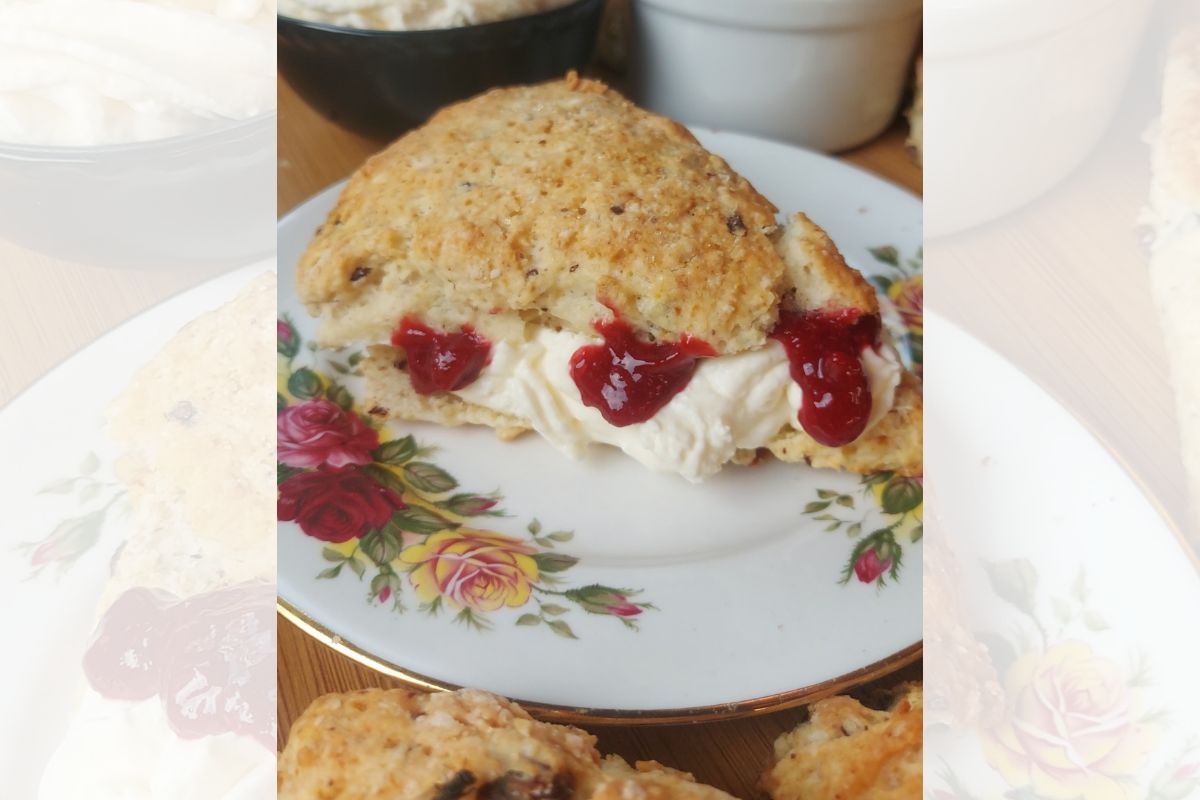
I absolutely love scones. Whether it’s a traditional British scone with clotted cream and raspberry jam or these delicious chocolate chip and apricot scones, I could honestly eat them every single day. There’s something about a freshly baked scone, thick cream and something fruity that I find almost impossible to resist.
I still remember trying homemade scones for the first time during my bakery course at college in England. I remember thinking, why on earth haven’t I been making these before? They were delicious, ridiculously simple to prepare and made with ingredients you probably already had in your kitchen.
That experience stayed with me, and scones have been one of my favourite things to bake ever since. I still have the traditional British recipe from those college days tucked away somewhere, and I’m sure I’ll dig it out eventually. In the meantime, I’ve been enjoying this version with chocolate and dried apricots, which is far too good not to share.
Why Chocolate and Apricots Work So Well Together
Chocolate chips and dried apricots might not be the first combination that comes to mind when you think of scones, but they work beautifully together. You get little pockets of chocolate, chewy pieces of apricot and just enough fruity sharpness to balance the sweetness. They’re a little different from the traditional British scones I first learnt to make, but every bit as enjoyable.
I always buy organic dried apricots for this recipe, preferably without added sulphites or other preservatives. If you’ve noticed that some dried apricots are bright orange while others are much darker, there’s often a reason. Sulphur dioxide is commonly used to preserve their colour, while unsulphured apricots naturally darken as they dry. I prefer the latter and always check the ingredients rather than relying on the word organic alone.
Although these chocolate chip and apricot scones are delicious on their own, I still love serving them with clotted cream and something fruity. Sometimes it’s a good raspberry jam, and sometimes I make a quick raspberry and honey spread. Both work wonderfully.

The Secret to Beautifully Flaky Scones
One of the things I particularly like about this recipe is the technique. Unlike the traditional round British scones I first learnt to make, these are cut into triangles, and the dough is folded several times to create delicate layers.
The most important thing to remember is to keep the butter cold.
Rather than using softened butter, you grate it straight from the fridge and work it lightly into the flour. There’s no need to rub everything into fine breadcrumbs. Leaving small pieces of butter throughout the dough helps create that lovely flaky texture as they melt during baking.
Then comes the folding. Gently pat or roll the dough out, fold it over itself, turn it and repeat. This distributes the butter and creates layers without excessive kneading.
And that’s important because scone dough isn’t bread dough. You don’t want to develop lots of gluten or work it until it’s perfectly smooth. Too much handling can leave you with tough, heavy scones instead of tender ones.
A Little Patience Before the Oven
Once the dough has been shaped and cut, I refrigerate the scones for around 20 minutes before baking. This allows the butter to firm up again, particularly if the kitchen is warm.
Buttermilk also plays a useful role here. Its gentle acidity adds flavour and contributes to a tender crumb, while the baking powder provides the rise. There’s no yeast involved and no need to wait around for dough to prove.
I like to brush the tops lightly with milk or buttermilk and finish with a little coarse sugar for a delicate crunch. Then it’s straight into a properly preheated oven until the scones are risen and golden.
And once the smell of warm chocolate and freshly baked scones starts filling the kitchen, it’s difficult to wait for them to cool.
Simple Baking, Lovely Results
One thing I’ve learnt over the years is that a recipe doesn’t need to be complicated to be worth making. Sometimes a few good ingredients and a little care with the technique are all it takes.
These chocolate chip and apricot scones are exactly the sort of thing I love baking when I fancy something homemade without spending half the day in the kitchen.
Serve them slightly warm, add a generous spoonful of clotted cream and raspberry spread, and put the kettle on. That’s my idea of a lovely afternoon.

Chocolate Chip & Apricot Scones – Buttery, Flaky & Irresistible
Course: DessertCuisine: BritishDifficulty: Easy8
servings15
minutes15
minutes310
kcalIngredients
- For 8 Chocolate Chip & Apricot Scones
250 g (2 cups) plain flour
75 g cold unsalted butter, grated
3 tsp baking powder
½ tsp salt
3 tbsp caster sugar
⅓ cup dried apricots, chopped (preferably organic and unsulphured)
½ cup chocolate chips
180 ml (¾ cup) buttermilk
1 tsp vanilla extract
- For the Topping
1–2 tbsp buttermilk or milk, for brushing
Coarse sugar, for sprinkling (optional)
Directions
- Prepare the dry ingredients.
In a large mixing bowl, combine the plain flour, baking powder, salt and caster sugar. - Add the cold butter.
Grate the butter straight from the fridge into the flour mixture. Gently rub it in with your fingertips, leaving some small pieces of butter visible. There’s no need to achieve a fine breadcrumb texture. - Add the chocolate and apricots.
Stir in the chocolate chips and chopped dried apricots, distributing them evenly throughout the flour mixture. - Add the wet ingredients.
Mix the buttermilk with the vanilla extract, then pour into the bowl. Gently combine with a spoon or spatula until a rough dough begins to form. Avoid overmixing. - Fold the dough.
Turn the dough onto a lightly floured work surface and gently bring it together. Pat or roll it out into a thick rectangle, fold it over itself, then rotate it 90 degrees. Repeat until you’ve completed four folds in total. Work gently and avoid kneading. - Shape and cut.
Pat the dough into a round disc approximately 2.5 cm (1 inch) thick. Using a sharp knife, cut it into 8 equal wedges. - Chill the scones.
Arrange the wedges on a baking tray lined with parchment paper, leaving a little space between them. Refrigerate for 20 minutes to allow the butter to firm up. - Preheat the oven.
While the scones are chilling, preheat your oven to 190°C (375°F), conventional. - Brush and sprinkle.
Lightly brush the tops with buttermilk or milk, then sprinkle with coarse sugar if using. - Bake.
Bake for approximately 12–15 minutes, or until the scones have risen and the tops are lightly golden. Baking time may vary depending on your oven. - Serve.
Transfer to a wire rack and allow to cool slightly. Enjoy warm on their own or with clotted cream and raspberry jam or homemade raspberry and honey spread.
Notes
- Keep the butter cold: Cold butter is essential for creating flaky layers. If it starts to soften while you’re preparing the dough, pop it back into the fridge for a few minutes.
Don’t overwork the dough: Mix just until the ingredients come together. The dough may look slightly rough, and that’s perfectly fine. Too much kneading can make the scones dense and tough.
Choose good-quality dried apricots: I prefer organic, unsulphured dried apricots without added preservatives. They’re usually darker in colour than sulphur-treated apricots, but their flavour works beautifully with chocolate.
Buttermilk substitute: If you don’t have buttermilk, mix 180 ml milk with 2 tsp lemon juice or white vinegar. Leave for 5–10 minutes before using. The texture may be slightly different from using real buttermilk.
Chocolate options: Dark, milk or semi-sweet chocolate chips all work well. I particularly like dark chocolate because it balances the sweetness of the apricots.
Watch the baking time: Ovens vary, so start checking after 12 minutes. The scones should be lightly golden and baked through without becoming dry.
Storage: Keep cooled scones in an airtight container at room temperature for up to 2 days. Warm them briefly in the oven before serving.
Freezing: Freeze completely cooled scones in an airtight container or freezer bag for up to 3 months. Thaw at room temperature and reheat gently in the oven.
Serving suggestion: Delicious slightly warm with clotted cream and raspberry jam, or a quick homemade raspberry and honey spread.