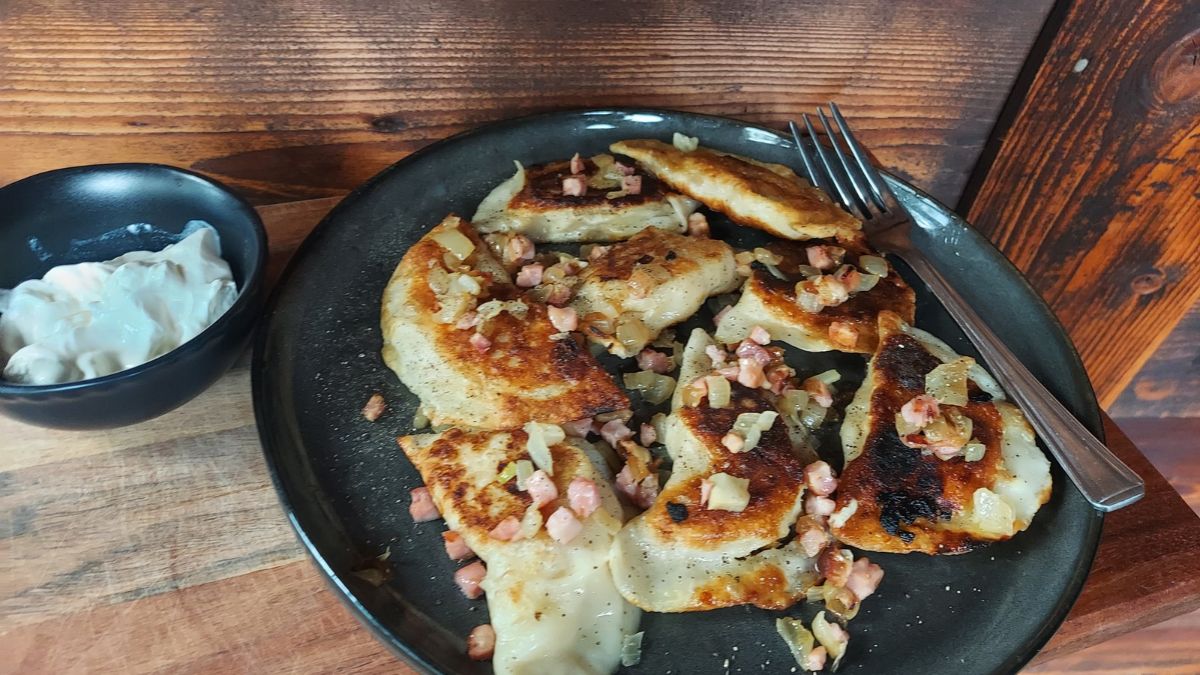
A Little Piece of Poland on a Plate
If there’s one dish that truly represents Polish home cooking to me, it has to be pierogi. I grew up eating them, my parents grew up eating them, and so did my grandparents. Now my own children have grown up with them too. This Polish pierogi recipe is the version I make for my family, inspired by the pierogi I grew up eating and the different ways my grandmother and mum prepared them.
That’s one of the things I love about pierogi. There isn’t just one way to make them, and every family seems to have its own favourites. Some recipes are passed down almost unchanged, while others evolve depending on who’s making them, what ingredients are available and, quite simply, what everyone enjoys eating.
My grandmother used to make potato pierogi with fried onions and lots of fresh dill. My mum makes hers without cheese, combining potatoes with plenty of deeply browned onions and a generous amount of black pepper. My own version is closer to traditional pierogi ruskie, filled with potatoes, cheese and fried onions. And just like my mum, I don’t hold back on the pepper. I love how it balances the sweetness of the onions and gives the filling a little kick.
Of course, Polish pierogi go far beyond potatoes and cheese. There are savoury versions filled with meat, sweet ones with seasonal fruit, and the wonderful combination of sauerkraut and mushrooms, which happens to be one of my absolute favourites. It’s a dish with so many variations that you could eat pierogi regularly and still have plenty of different fillings to explore.
My son absolutely loves pierogi, especially the freshly boiled ones. He’s usually quite sensible when it comes to portion sizes, but put a plate of pierogi in front of him and suddenly all those sensible limits disappear. I’m fairly certain he could eat an entire bucket if I let him!
And I think anyone who grew up eating good homemade pierogi will understand this: the shop-bought ones just don’t compare. At least, that’s how everyone in my family feels. The dough is often too thick, there’s barely enough filling, and sometimes the flavour is just a little odd. We’ve tried them, but honestly, if there are no homemade pierogi, we’d rather go without. Shop-bought ones simply aren’t an option in our house.
Despite how much we all enjoy them, I only make pierogi about twice a year. Not because the ingredients are complicated, but because making enough for a family of four takes a fair bit of time and patience. In my kitchen, that usually means around 70–80 dumplings, and there’s quite a difference between making a handful and preparing that many from scratch.
And it’s never just a matter of standing at the kitchen counter and shaping one pieróg after another. You’re rolling out another portion of dough, cutting circles, filling and sealing them, while keeping an eye on the batches already cooking. Meanwhile, the washing machine needs emptying, someone wants something, and just as you’re getting into a rhythm, your sister calls. Before you know it, half the afternoon has disappeared, and there’s still another piece of dough waiting to be rolled out.
Which is why, if you’re lucky enough to have a grandmother who still makes homemade pierogi for you, count your blessings! And if you know a lovely lady who makes them from scratch and sells them, make sure you pay her properly and leave a generous tip. Trust me, she’s earned every penny.
I’ve been making pierogi for as long as I can remember, but I still wouldn’t call myself a professional pierogi maker. Some days everything goes smoothly, and other days the dough seems to have a mind of its own. Over the years, though, I’ve learnt a few things that make the process easier, and they’re worth sharing if you’re planning to make your own.
This homemade Polish pierogi recipe uses a simple hot-water-and-butter dough with a potato, cheese and fried onion filling. It’s the kind of food that takes a little effort but brings everyone happily to the table. And although I don’t make pierogi nearly as often as my son would like, I can’t imagine our family kitchen without them.
How to Make Polish Pierogi: Dough, Filling & Cooking Tips
The ingredients for homemade pierogi are simple, but a few small details can make a big difference to the finished dumplings. From the consistency of the filling to the amount of flour on your worktop, here’s what I’ve learnt about making pierogi that are soft, delicate and easy to work with.
How to Make Soft, Elastic Pierogi Dough
For me, the perfect pierogi dough is thin, soft and delicate, but strong enough to hold a generous amount of filling. Too thick, and you end up with a heavy, doughy mouthful that overwhelms everything inside. Too thin, and you risk tearing the wrapper or having the filling escape into the cooking water.
The dough should feel smooth, pliable and easy to roll. If it’s too stiff, it can shrink back every time you pass the rolling pin over it. If it’s excessively sticky, it becomes difficult to handle, but adding handfuls of flour isn’t necessarily the answer.
Knead the dough until it becomes smooth and elastic. If it genuinely needs more flour, add a little at a time. Once ready, cover it and leave it to rest for around 30 minutes. This allows the gluten to relax, making the dough easier to roll thinly without constantly springing back.
Getting the Potato and Cheese Filling Right
For potato and cheese pierogi, the filling should be soft and well combined, but firm enough to stay in place when you fold the dough. Floury potatoes work particularly well because they mash easily without becoming watery. Drain them thoroughly after cooking and let the excess steam escape before mixing in the remaining ingredients.
Traditional pierogi ruskie are usually made with Polish twaróg, but I use cottage cheese in my version. Since cottage cheese varies in moisture, it’s worth draining it if necessary and adding it gradually until the filling reaches the right consistency. Too much liquid can make the pierogi difficult to shape and seal.
The onions are just as important. I like them nicely browned, bringing a gentle sweetness to the potatoes and cheese. Add plenty of freshly ground black pepper and taste the filling before you start shaping. It should already be delicious on its own.
How Thin Should You Roll Pierogi Dough?
I aim for approximately 1–2 mm thick, depending on how easily the dough rolls and how much filling I’m using. It needs to be thin enough to stay delicate after cooking, but not so thin that it tears when folded.
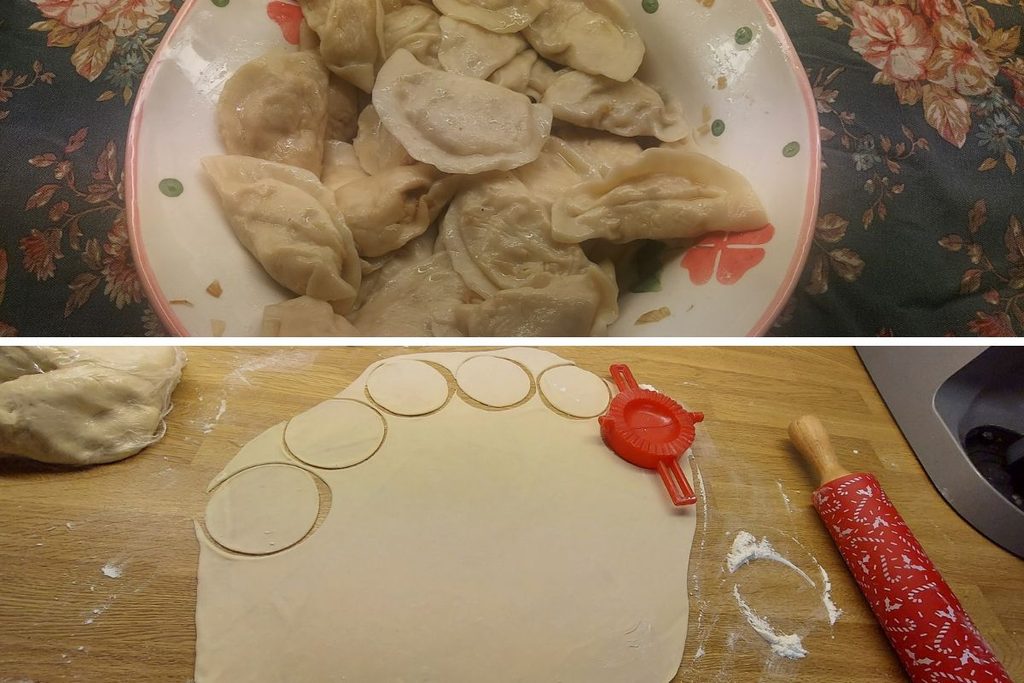
Use just enough flour to stop the dough from sticking. It’s tempting to keep scattering flour over the worktop, especially when you’re rolling several batches, but too much can make the dough drier and the finished pierogi tougher. Flour can also coat the edges of the circles, making them harder to seal properly.
I find it better to dust the surface lightly and add more only when needed. Work with one portion of dough at a time, keeping the rest covered so it doesn’t dry out. Cut out your circles, add the filling and press the edges together firmly, making sure none of the filling gets caught in the seam.
If a pieróg refuses to stay closed, check whether there’s flour or filling along the edge before pressing it together again. A good seal is important, particularly when the dumplings begin moving around in the boiling water.
Arrange the finished pierogi in a single layer on a lightly floured tray or clean kitchen towel, leaving a little space between them. They can stick together surprisingly easily, particularly if the dough is soft or they’re left touching for too long.
How Long Should You Boil Fresh Pierogi?
Thankfully, the cooking is much quicker than the preparation!
Bring a large pot of salted water to a boil, then reduce the heat slightly so the water isn’t bubbling too vigorously. Add the pierogi in manageable batches and give them a gentle stir to prevent them from sticking to the bottom.
Fresh pierogi with thin dough generally need around 1–2 minutes after floating to the surface, although larger or thicker ones may take longer. I recommend testing one from the first batch to make sure the dough is cooked through, particularly around the sealed edge.
Once ready, remove them with a slotted spoon and allow the excess water to drain. Spread them out rather than piling them immediately into a bowl. This gives the steam a chance to escape and helps prevent the soft surfaces from sticking together.
A little melted butter or fat from fried onions will also help keep them separate. There’s no need to rinse freshly cooked pierogi in cold water when you’re serving them straight away.
Serving, Pan-Frying and Freezing Pierogi
Pierogi are delicious straight from the water, topped with golden-brown onions, crispy bacon and a spoonful of sour cream or plain yoghurt. You can also pan-fry cooked pierogi in a little butter until they develop a golden, lightly crisp surface. Both ways are traditional favourites, and each gives the dough a completely different texture.
If you’re making a large batch, it’s worth preparing a few extra for the freezer. Arrange uncooked pierogi separately on a tray and freeze until firm before transferring them to a freezer bag or airtight container. This prevents them from freezing together into one solid lump.
When you’re ready to eat them, cook them straight from frozen in gently boiling salted water, allowing a little extra time for them to cook through.
And that’s one of the reasons I think making a large batch is worth the effort. You do the rolling and shaping once, then have homemade pierogi ready for another day.

How to Make Polish Pierogi: Dough, Shaping & Cooking Tips
Course: Main CourseCuisine: PolishDifficulty: Medium10
servings1
hour30
minutes30
minutes500
kcalIngredients
- For the Pierogi Dough
300 g plain flour (all-purpose flour)
200 ml hot water
25 g butter
A pinch of salt
- For the Potato and Cheese Filling
500 g floury potatoes, peeled weight
200–250 g cottage cheese, drained if necessary
2 medium onions, finely diced
1–2 tbsp butter or olive oil, for frying
Salt, to taste
Generous amount of freshly ground black pepper, to taste
- To Serve (Optional)
Caramelised onions
Crispy bacon pieces
Sour cream or plain yoghurt
Directions
- Prepare the Filling
- Peel the potatoes and cut them into evenly sized pieces. Place in a saucepan of salted water and cook until tender, approximately 15–20 minutes, depending on their size.
- Drain the potatoes thoroughly and return them to the warm saucepan for a minute or two, off the heat, to allow any excess moisture to evaporate. Mash until smooth or pass through a potato ricer, then leave to cool.
- Meanwhile, heat the butter or olive oil in a frying pan over medium-low heat. Add the finely diced onions and cook for approximately 15–20 minutes, stirring occasionally, until soft and beautifully golden brown.
- Add the fried onions to the mashed potatoes and mix well. Gradually add the cottage cheese, checking the consistency as you go. The filling should be soft and creamy but firm enough to hold its shape, not wet or runny.
- Season with salt and a generous amount of freshly ground black pepper. Taste and adjust the seasoning, then set aside to cool completely.
- Make the Pierogi Dough
- Place the flour and a pinch of salt in a large mixing bowl.
- Add the butter to the hot water and stir until melted. Gradually pour the mixture into the flour, stirring with a spoon until a rough dough forms.
- Once cool enough to handle, transfer the dough to a worktop and knead for approximately 5–8 minutes until smooth, soft and elastic. Avoid adding unnecessary flour.
- Cover the dough with a bowl or cling film and leave to rest for approximately 30 minutes.
- Shape the Pierogi
- Divide the dough into manageable portions, keeping the remaining dough covered to prevent it from drying out.
- Lightly dust the worktop with flour and roll out one portion of dough to approximately 1–2 mm thick. Cut out circles using a round cutter or the rim of a glass, approximately 7–8 cm in diameter.
- Place a spoonful of filling in the centre of each circle. Fold the dough over to form a half-moon shape, then press the edges together firmly, making sure no filling gets trapped in the seam.
- Arrange the shaped pierogi in a single layer on a lightly floured tray or clean kitchen towel, leaving a little space between them. Repeat with the remaining dough and filling.
- Cook the Pierogi
- Bring a large pot of salted water to a boil, then reduce the heat slightly to maintain a gentle boil.
- Carefully add the pierogi in batches, without overcrowding the pot. Stir gently to prevent them from sticking to the bottom.
- Once the pierogi float to the surface, cook for approximately 1–2 minutes more, depending on the thickness of the dough. Test one from the first batch to make sure the dough is cooked through, particularly around the sealed edges.
- Remove with a slotted spoon and allow the excess water to drain. Arrange the cooked pierogi in a single layer on a lightly greased plate or tray, then gently coat with a little melted butter or oil to prevent sticking.
- Serve warm with caramelised onions, crispy bacon and sour cream or plain yoghurt, if desired. Alternatively, pan-fry the cooked pierogi in a little butter until golden and lightly crisp.
Notes
- Choosing the right potatoes:
Floury potatoes work best for pierogi ruskie. Look for Maris Piper or King Edward in the UK, mehligkochend potatoes in Switzerland, or type C potatoes in Poland. Drain them thoroughly after cooking and allow excess moisture to evaporate before mashing
Cottage cheese or Polish twaróg:
Traditional pierogi ruskie are made with twaróg, a firm, slightly tangy curd cheese. Cottage cheese also works, but its texture and moisture content vary between brands. Drain off any excess liquid and add it gradually, using less if the potatoes are particularly moist. The filling should be soft but firm enough to hold its shape.
Don’t skimp on the pepper:
I like a generous amount of freshly ground black pepper in my filling. It should be clearly noticeable alongside the sweetness of the browned onions.
Avoid too much flour:
The dough should be soft, smooth and elastic. Add extra flour sparingly during kneading and rolling, as too much can make the finished pierogi tough. Keep the edges of the dough circles free from excess flour so they seal properly.
Let the dough rest:
Resting the dough for approximately 30 minutes helps it relax, making it easier to roll thinly without shrinking back.
Keep everything covered:
Work with one portion of dough at a time and keep the rest covered to prevent drying. Arrange shaped pierogi separately on a lightly floured surface, ensuring they don’t touch.
Cooking time:
Fresh pierogi generally need another 1–2 minutes after floating to the surface, depending on their size and dough thickness. Test one from the first batch to check that the dough is cooked through.
Preventing sticking:
Drain cooked pierogi well and spread them out in a single layer to release steam. Lightly coat with melted butter or oil before transferring them to a serving dish.
Freezing pierogi:
Place uncooked pierogi on a lightly floured tray without touching and freeze until firm. Transfer to a freezer-safe bag or airtight container. Cook directly from frozen, adding a little extra cooking time.
Serving suggestions:
Enjoy freshly boiled with caramelised onions, crispy bacon and sour cream or plain yoghurt. Leftover cooked pierogi are also delicious pan-fried in butter until golden and lightly crisp.
Yield:
This recipe makes approximately 40 pierogi, depending on the diameter of your dough circles and how thinly you roll the dough.
Calories: 520 kcal per serving