There is something that happens to me with most ready-made chocolate bars.
The first bite is nice.
And honestly, I could probably stop right there.
It’s actually one of the reasons I started making my own homemade frozen Snickers.
By the second bite, the sweetness starts becoming overwhelming. Not just a little too sweet, it actually scratches my throat to the point where I need a glass of water. Then I drink the water, it fills me up, I don’t really want another bite, and that little moment of pleasure I was supposed to get from eating chocolate is basically gone.
And that’s the part I don’t like.
Because when I choose to have a treat, I want to taste it.
I want the chocolate. I want the roasted peanuts. I want the creamy centre and the caramel. I want to chew it slowly enough to notice all those different flavours and textures together. With many ready-made chocolate bars, I just don’t get that.
Take a Snickers. I know there’s nougat, caramel, peanuts and chocolate in there. It’s actually a combination I really like. But after that first bite, the sweetness becomes so dominant that all those individual flavours seem to disappear underneath it.
Instead of enjoying the caramel, peanuts and chocolate, I feel like I’m swallowing sweetness and then reaching for water.
That’s not really a treat to me. A treat should be something I genuinely enjoy eating.
I want that first bite to make me want the second one — not because I can’t stop eating it, but because it tastes good.
I want to sit there for a moment and actually enjoy the contrast between creamy and crunchy, salty and sweet, with a little bitterness from dark chocolate.
And yes, I know something like this can still be calorie-dense. That’s not really the point. If I’m choosing to have a chocolatey, peanutty, caramel-covered treat, I don’t need it to be low-calorie.
I want it to be worth eating.
And that’s how my homemade frozen Snickers came about.
Why I Make My Own Homemade Frozen Snickers
I wasn’t trying to recreate a Snickers bar ingredient for ingredient, and I wasn’t trying to make a “healthy Snickers” either.
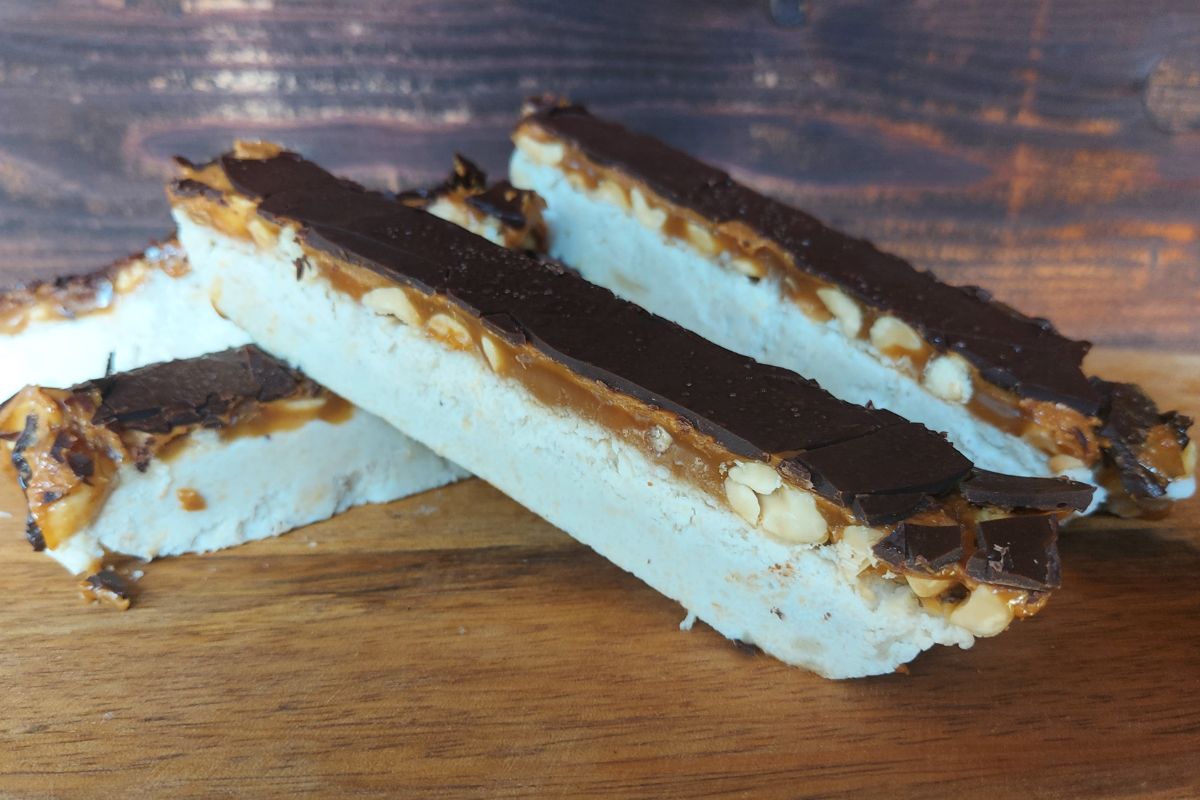
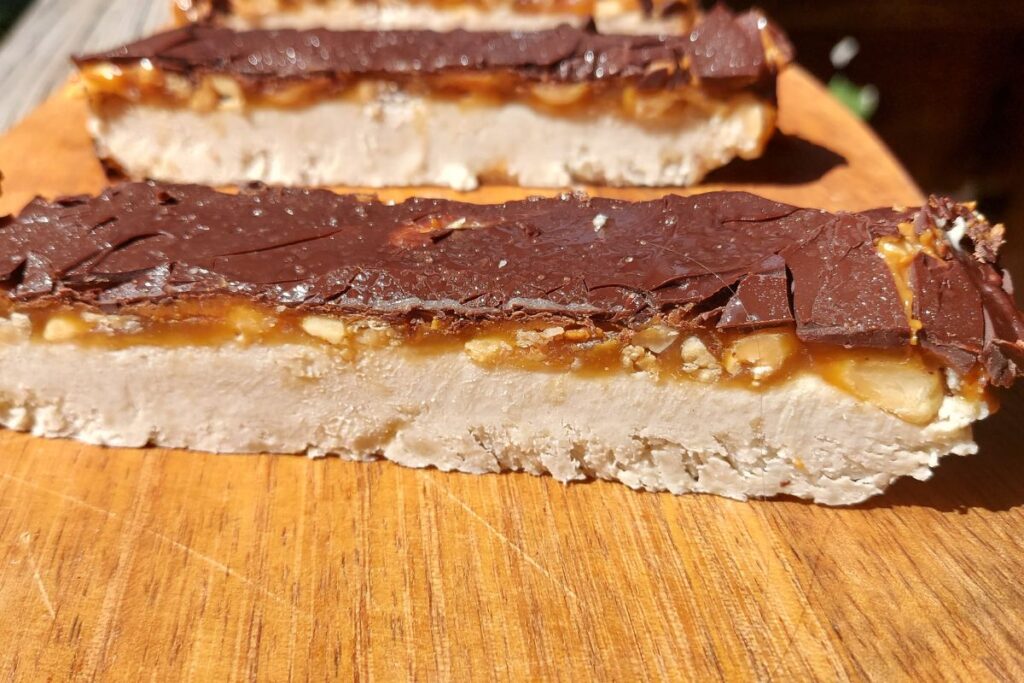
I simply took the part that appealed to me: chocolate, caramel and peanuts, and made something around those flavours that I actually wanted to eat. My version starts with a creamy cashew and coconut base. Then there’s peanut butter, actual peanuts for crunch, caramel and finally chocolate.
And I make the caramel two ways, what I like about these homemade frozen Snickers is that both versions work for completely different reasons.
Sometimes I use date caramel, and sometimes I make a proper classic caramel with white sugar, butter and cream. They’re different, and I like both.
The date caramel version, especially with dark chocolate without added sugar, is probably what I’d call my little homemade gem. It’s the kind of frozen treat I’d actually struggle to find ready-made: cashews, coconut milk, peanut butter, peanuts, dates and dark chocolate all together.
But sometimes I want proper caramel. And when I want caramel, I make caramel.
White sugar. Butter. Cream.
I’m equally happy with that version too.
That’s what I love about making things at home. I make them with care. I choose good ingredients, I pay attention to the little details, and I can make something taste exactly the way I want it to taste. It’s the same reason I love making things like my no bake carrot cake bars. They started as another little kitchen experiment and turned into something I genuinely wanted to make again.
These aren’t really a copy of the original Snickers bar. The inspiration is there — chocolate, caramel and peanuts — but what comes out of my freezer is very much its own thing.
Creamy and nutty, with proper pieces of peanut to chew, enough caramel to enjoy without it taking over, and dark chocolate bringing a little bitterness against the sweetness.
It’s the kind of treat I want to take my time with.
And the other reason I keep making them?
They’re surprisingly quick.
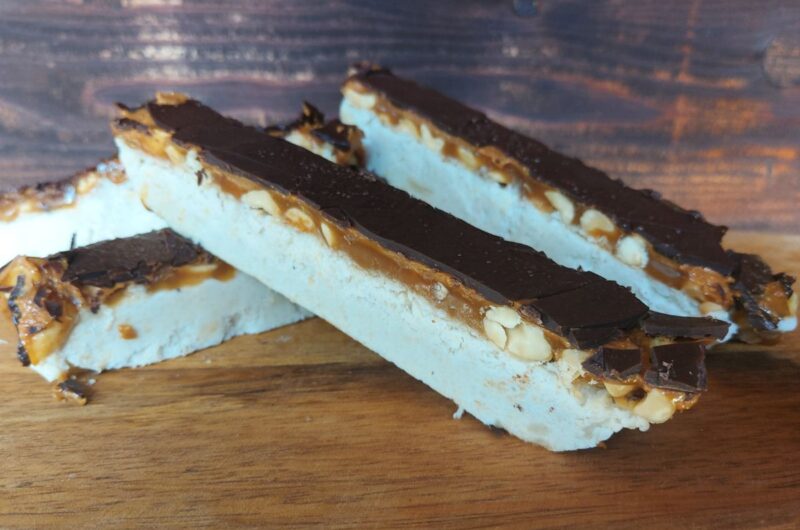
Homemade Frozen Snickers – My Favourite Freezer Treat Two Ways
Course: DessertDifficulty: Easy12
servings30
minutes10
minutesIngredients
200 g cashews
100–150 ml full-fat coconut milk, well mixed
1 tbsp maple syrup
3 tbsp Peanut butter
50g Peanuts
Caramel – Choose One
Option 1: Date caramel
120 g soft pitted dates
40–60 ml warm water, added gradually
Option 2: Classic caramel
160 g white granulated sugar
80 ml double/heavy cream
40 g unsalted butter
Dark chocolate, or chocolate of choice
Directions
- Prepare the tin
Line a 6.5 × 8.5 inch (16.5 × 21.5 cm) rectangular tin with baking paper or cling film. Leave some hanging over the sides so you can easily lift the frozen bars out later. - Make the cashew base
Add the cashews, 100 ml coconut milk and maple syrup to a blender or food processor.
Blend until smooth and creamy. If the mixture is too thick to blend properly, add more coconut milk a little at a time. You can use up to approximately 150 ml, but don’t add it all at once.
You’re looking for a thick, creamy and spreadable consistency, not something runny.
Spread the mixture evenly over the bottom of the prepared tin.
Place in the freezer for approximately 20 minutes, or until the surface is firm enough for the next layer. - Add the peanut layer
Remove the tin from the freezer.
Spread 3 tablespoons of peanut butter evenly over the cashew base, then scatter the peanuts over the top.
Now choose which caramel you’d like to make. - Option 1 – Date Caramel
Make the date caramel
If your dates are already very soft, you can blend them straight away. If they’re quite firm or dry, cover them with hot water and leave them to soften for approximately 10 minutes, then drain.
Add 120 g pitted datesto the blender with 40 ml warm water.
Blend until you have a smooth, thick caramel-like paste. Add a little more water if necessary, but do it gradually, you want the date caramel to be thick enough to spread, rather than pourable.
Spread the date caramel evenly over the peanut layer.
Place the tin back in the freezer for 10–20 minutes, until the caramel has firmed up. - Option 2 – Classic Caramel
Make the classic caramel
Before you start, have your butter and cream ready.
The butter should be at room temperature, and I like to gently warm the cream as well. Don’t add fridge-cold cream or butter straight into extremely hot caramel.
Add 160 g white sugar to a small, heavy-based saucepan.
Heat gently until the sugar begins to melt. Allow it to melt and caramelise until it reaches a rich golden-amber colour. Keep an eye on it because once sugar begins to caramelise, it can go from golden to burnt very quickly.
Remove from the heat.
Carefully add the 80 ml warm cream, a little at a time. The mixture will bubble vigorously, so take your time and be careful.
Stir until combined, then add 40 g room-temperature butter and stir until you have a smooth, glossy caramel.
Let the caramel cool before adding it to the frozen bars. You don’t want to pour very hot caramel directly onto your peanut butter and frozen cashew layer. Once cooled but still spreadable, spread approximately half of the caramel over the peanut layer.
Keep the remaining caramel in the fridge for something else.
Return the tin to the freezer for 10–20 minutes, until the caramel layer has firmed up. - Add the chocolate
Melt 80 g dark chocolate gently, either in a bowl over barely simmering water or in short intervals in the microwave.
Remove the tin from the freezer and pour the melted chocolate over the caramel.
Spread it quickly into an even layer.
Freeze
Return the tin to the freezer for approximately 20 minutes, or until the chocolate is set and the layers are firm. - Cut into pieces
Use the baking paper or cling film to lift the whole slab from the tin.
Cut into approximately 12 pieces.
If the chocolate is completely frozen and very hard, let the slab sit at room temperature for a few minutes before cutting to reduce the chance of the chocolate cracking. - Store
Keep your homemade frozen Snickers in a covered container in the freezer.
I like them straight from the freezer, but if yours are very firm, leave one at room temperature for a few minutes before eating.
Notes
- Coconut milk: Mix the coconut milk thoroughly before measuring because the cream and liquid often separate in the tin.
Cashew base: Start with 100 ml coconut milk. The exact amount you need will depend on your cashews and blender, so add more only when necessary.
Caramel: The classic caramel recipe intentionally makes extra. I prefer making a proper batch and keeping the rest in the fridge rather than trying to caramelise a tiny amount of sugar just for these bars.
Chocolate: Dark chocolate is my favourite here because the slight bitterness balances the caramel, but use whichever chocolate you actually enjoy.
Two versions: The date caramel and classic caramel aren’t meant to taste identical. They’re two different versions of the same frozen treat, and that’s exactly the point.